Wire Trigger/Bolt Springs

detroiter711

New member
Are the wire type bolt springs more durable than the original flat style bolt - trigger springs? Just curious, as an 1851 I had previously had a bad habit of breaking the flat springs.
 

45 Dragoon

New member
Wires last pretty good although, I've had customers springs break (no, I didn't break um on purpose!) so I replaced them with tuned flats. Coils last pretty much for ever.
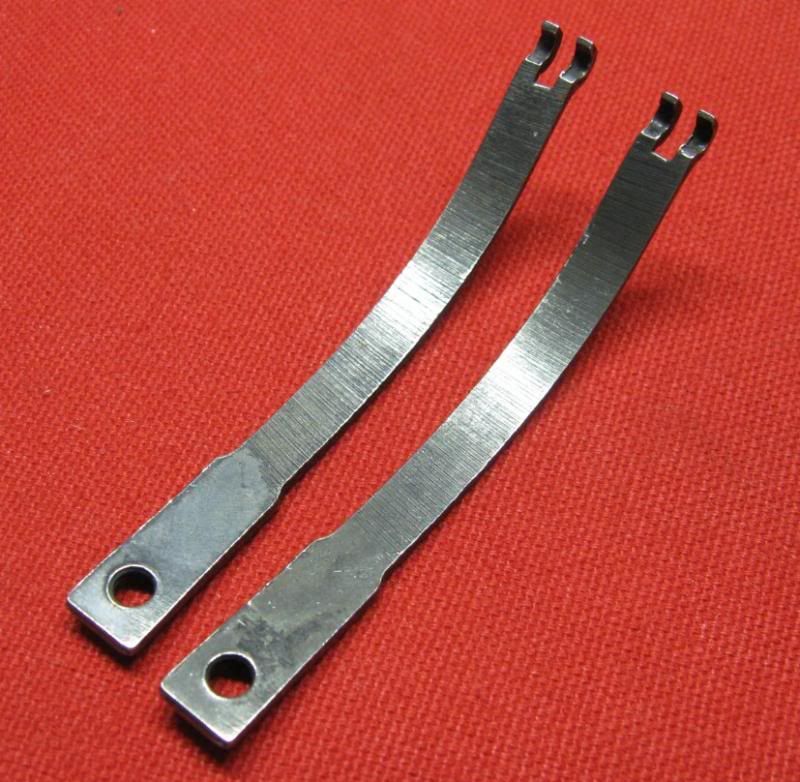
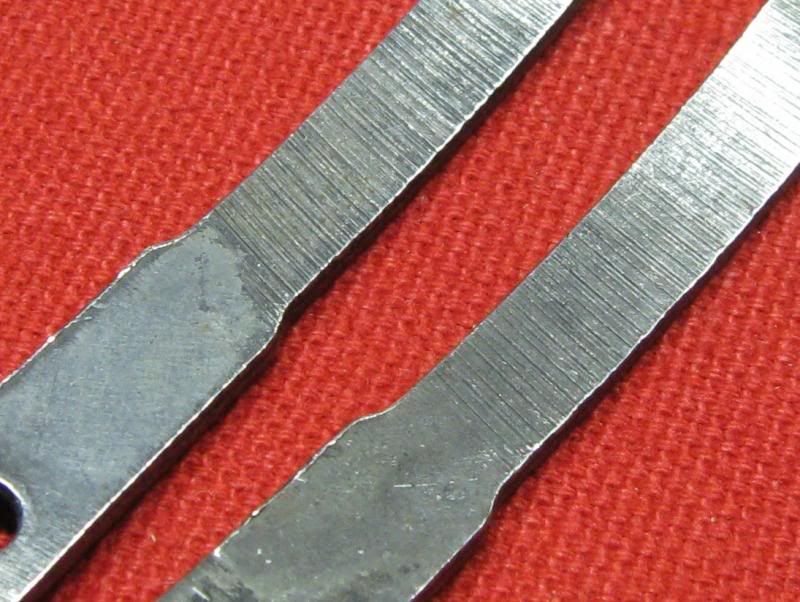
Flats are old school and most (all) are over stressed/ over tensioned. Tuned to do their job, flats will last (the average shooter) as long as the gun.

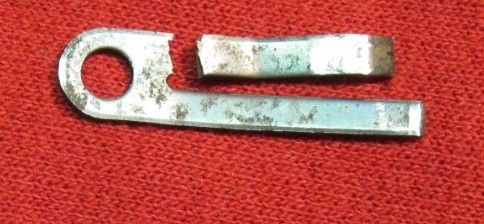
Possible reasons for frequent breaking of the combo (bolt/trigger) spring may be:
- trigger spring too long and binding (although operational), - not "tuned" ,- frame not flat (Burr or ridge, rough casting/ machine marks) where the spring mounts, - bad angle of mounting surface (put a thin washer under the spring to "clean up" surface. Not a split washer! There's another stress area!!)

Personally, I like the feel/ crisp action of flat springs. Especially the hand spring. It seems to be the most prone to breaking but - tuned and contoured correctly, it too, will last as long as the revolver. The hand has two jobs 1- to rotate the cylinder, 2- to brake the rotating cyl for bolt lock up. The hand spring is actually a version of a "progressive rate" spring. It can be tuned to allow a rather easy spin but still have enough "braking" force to do its job with lock up. It does this as it rides with the hand up the hand passage (chimney).
The problem with a coil and plunger system (Ruger) is, the spring/plunger are mounted in the frame. As the hand moves up the chimney, it gets further away from the plunger and thus, the tension needed for "breaking" is diminished. You can demonstrate throw-by (cyl over rotation) at will with a S.A. Ruger because of this set up.

Mike
www.goonsgunworks.com
Follow me on Instagram @ goonsgunworks
 
Last edited:
Howdy

Here is a broken trigger/bolt spring from a 2nd Generation Colt Single Action Army. This is very typical of how they tend to break. The break went right across one of the legs of the spring. What usually happens is stress builds up at some imperfection in the spring. A sharp corner, a burr, a deep scratch, any of these can act as a stress riser. As the spring continues to flex many times, the stresses build up and a tiny crack forms. As the spring continues to flex, the stresses build and the crack grows. Sometimes the stresses build up such that the part suddenly breaks all at once. Sometimes with this part the crack will propagate across surface of the leg, but it will not penetrate completely through. In this case the shooter may notice the spring has lost some of its force, but the spring still has some rigidity. Usually in this case if the shooter unscrews the spring it will fall apart in his hands when he removes it.

broken%20bolt_zpstrr4xbao.jpg


A wire spring is less likely to break because the wire is usually polished very smooth and there are no imperfections where stresses will start to build. If the wire spring is a coil spring, then the stress of flexing gets spread out over a larger length than with a simple leaf spring. That is another reason why wire springs can be more durable.


Here are a couple of main springs for Uberti lever rifles. The horizontal lines across the springs are tooling marks left from grinding the springs to shape.

ubertihammersprings_zpsd486a17e.jpg


Here is a closeup of the tooling marks. These are perfect stress risers. I once had one of these springs snap in half during a match. A crack formed at one of the tool marks and the spring suddenly snapped in half. I levered the gun and there was no resistance from the hammer. Lucky I had a spare rifle with me that day. I have since learned to carefully grind away those tooling marks with a dremel tool. Yes, if you are careful and don't try to take too much at one pass a dremel tool can be very hand for polishing out imperfections in springs. Frankly, I am surprised that more of these springs don't break because of those tooling marks left behind, but mine seemed to be a pretty isolated case.

ubertihammerspringscloseup_zps2d44e8f1.jpg


By the way, I agree completely with 45 Dragoon about the braking action of a properly adjusted hand spring in a revolver. I had a Colt with a hand spring that was too weak. I could get that revolver to over rotate any time I wanted to by interrupting the hammer pull about halfway through full cock. The hammer had not been pulled back far enough yet for the bolt to pop in place, yet the momentum built up by the cylinder carried it too far so that when full cock was completed and the bolt popped up, the cylinder had rotated too far. tightening the tension on the hand spring fixed that problem and it never recurred. I know a lot of guys in CAS who want their guns tuned so much that the springs are barely doing any work at all. Those revolvers are prime candidates for over rotation. They like their revolvers to whisper when the cylinder is spun. I like to hear a nice loud ratchet sound like a 17 year locust. Then I know the hand spring is doing its job of braking the cylinder.
 

Branko

New member
So, let's say you decided to put in some replacement flat springs; you'd suggest polishing them mirror-like?
 

45 Dragoon

New member
The combo spring contact areas don't need to be mirror, just smooth with sides not touching against the frame walls. I put a spacer (washer) under it for a clean/raised platform which is easier to make adjustments from. You only need 3-4 lbs tension on the bolt, trigger spring can be adjusted to fine tune preferred weight.
The hand spring can be mirror at the contact area (after contouring) since it is also a bearing surface. The walls of the hand "chimney" should be prepped with a file to knock off the peaks of an irregular surface. There's nothing to gain by polishing the whole spring. You only chance the possibility of heating the spring too much.

Mike
www.goonsgunworks.com
Follow me on Instagram @ goonsgunworks
 
So, let's say you decided to put in some replacement flat springs; you'd suggest polishing them mirror-like?

More important than polishing them to a mirror finish is going over them on all the edges and making sure there are no nicks, scratches, or dents anywhere. That can be done with a fine file, then progress to fine emery cloth and finish with a stone.

If you look carefully at my photo of the broken bolt/trigger spring you will see that there is a radius between the two legs, rather than two sharp corners. That was done to prevent a stress riser at the corners. I guess it didn't work too well with that spring.

As far as home made springs are concerned, I know some guys who make up hand springs for Colts and replicas from bobby pins.
 

James K

Member In Memoriam
Ideally, a Colt SA type action is tuned so the hammer stops on the backstrap at the same time as the hand carries the cylinder up and the bolt drops into the stop notch, and just a tad after the trigger drops into the full cock notch in the hammer. That prevents the condition where the hand is trying to force the cylinder around after it has locked up, a situation that imposes extra stress on the hand, bolt, ratchet and stop notches.

Edited to add: The trigger/bolt springs can also be feathered as was done in the old days, especially the bolt spring, to make it less prone to breakage and to reduce its tension, which in turn will reduce or eliminate the gouging in the cylinder leade where the bolt drops. That spring is much more powerful than it needs to be.

Jim
 

45 Dragoon

New member
James K,
Lots of folks say that but that is not correct. The limiting factor is the full cock notch. Colts factory protocol says all action elements should be complete at full cock, not with hammer on the backstrap. Any movement after lockup IS forcing the hand into the ratchet (on a S.A. with correct timing).
The S.A.A. was originally designed with an internal action stop (which is exactly why I install a stop in all S.A.s, it was intended). The thick boss (extra material) around the mounting pin on the hand was intended to contact the webbing between the hammer/hand passage. This would effectively stop the action and protect the action parts from unnecessary wear. Unfortunately, this (in production) didn't work out because of clearances that would need to be maintained. It was decided that the second finger of the new "2 fingered" hand was in a position that would cause the least amount of wear (it's mechanical advantage is much stronger to stop "your" action!).
All that said, the best way for an action to have perfect timing and stop the movement from over extending the hammer (which will obviously stop all of the action), is to install an action stop after the action has been setup.
If you insist on having the backstrap be that stop, you'll need to find a perfectly matching trigger/hammer/backstrap relationship (which is going to be hard to do). The easiest thing to do is just install an action stop (set screw on the trigger guard under the mainspring).

Again, the correct timing parameters are from rest to full cock (which for those that don't know, is the bolt locking the cylinder and full cock being reached simultaneously, sounding like one "click". The last "click".

Mike
www.goonsgunworks.com
Follow me on Instagram @ goonsgunworks
 
Last edited:

45 Dragoon

New member
Ideally,
a S.A. with correct timing and an action stop installed, will have no contact between the hand and the ratchet at full cock. That means, the slightest play the cylinder has at rest (cyl locked obviously) should be present at full cock (proving no contact with the hand). If said clearance isn't present at full cock (or some clearance), there is contact of the hand and ratchet.

Mike
www.goonsgunworks.com
Follow me on Instagram @ goonsgunworks
 
As usual, 45dragoon, your post is a wealth of useful technical information. Thank you, you've got three of my revolvers torn apart as I'm fidgeting with timing points. Ha ha.
 
Top