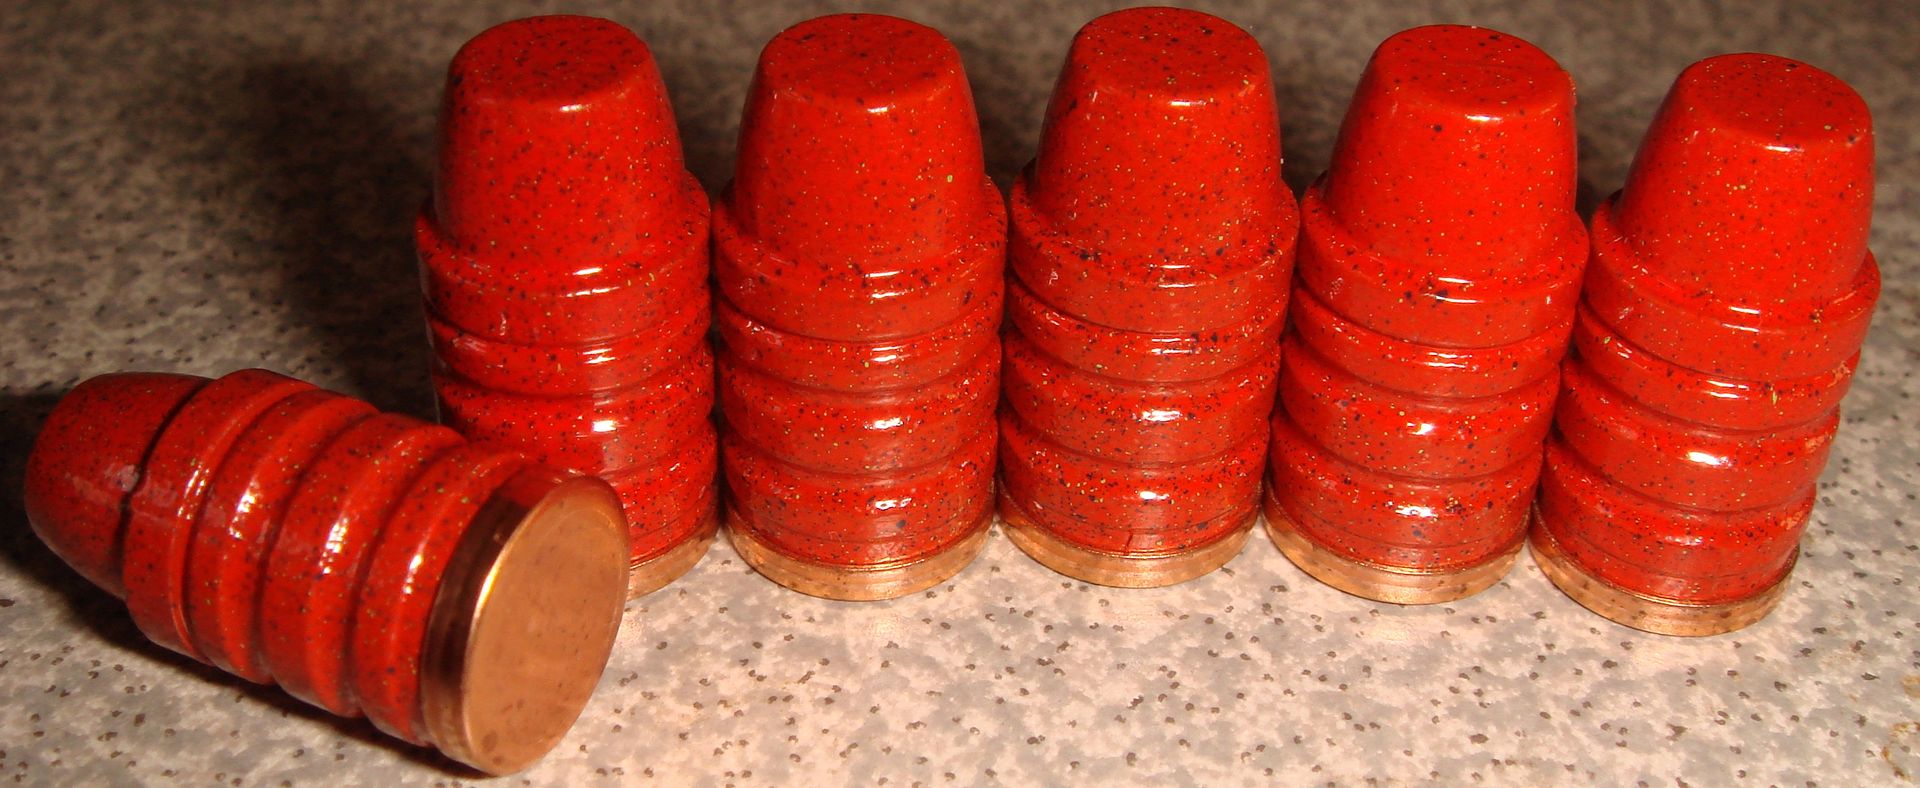
Powder coating rifle bullets

I have a idea and thought I'd throw it out here and get some opinions. Keeping rifle bullets standing up during powder coating and transferring them to the oven and back out has been a problem. I may have a easy solution.

Hopefully I can explain this clearly and paint a picture since I haven't actually made this contraption.

Take a flat metal pan and drill a hole on each side across from each other and install a screw in both holes. Line the bullets in a straight line between the two screws. Wrap a wire around one screw and then in a straight line to the other screw and at the same time put the wire into the lube grooves of the bullets, now wrap the wire again around the opposite screw and back the other direction. Simple enough to hold the bullets to make moving them easier.

Here's a rough drawing to give you an idea...

PC_bullet_zps53de74e8.jpg
 
I haven't tried it as of yet. I actually just brain stormed this idea so I may have to get busy on it. I figure it should only leave a very small area in the lube groove uncoated when the wire is removed. No harm no foul in that area so I'm pretty hopeful this would be a great remedy. One quick wrap with the wire shouldn't take that long to set em' up.
 

Vance

New member
I heard of one guy who uses a solid copper wire to make a hanger for each bullet. The wire is formed into a loop that goes into the lube groove and then the tail has a hook to hang the bullet from a wire rack. Apply the powder coating with the es gun and then bake.
 
Very interesting Beagle333 but twisting in between each bullet would seem to be a bit time consuming but doable.

I'm thinking a screw on each end and placing one bullet at one end and another at the other end would create a template between the wires to just "clip the rest in between. Don't know yet but i'm sure going to try it and find something that works.

I'm going to check harbor freight or Lowes tomorrow for some super thin wire and start experimenting.

To start I'm looking at Powder Coating .309 pills for my Garand at 1,800 fps. The mold I have is a GC. Should I PC after installing the gas checks or before ?
 

Beagle333

New member
That depends on your GC shank. If you can check after the shanks grow .002", then go that way. But if your checks fit tight as cast (as most do)... just check first and pc over them. I have asked and even started a thread on it somewhere on CB and all responses said it didn't matter if you coated your checks or not... no difference.

Checked before coat...
360156009_zps53b8f2c3.jpg


checked after coat...
rcbs001_zps0723919f.jpg
 
The only difference that comes to mind after looking at the photos is the uncoated gas check would aid in cleaning the barrel as the bullet travels the length of the barrel. Although PC bullets don't leave much of a trace anyways but again, just a hypothesis.
 

Beagle333

New member
I don't think either one of them leave anything in the barrel, but if you wanted to, just for the looks or to test the theory, you could always just use a large ball bearing or one of the other methods to flare your checks and swage them onto any coated GC base. :)
 
Good point, I'll just install the GC's first then PC the bullets. I didn't consider having to flare. I'd rather keep the regimen simple. Thanks!...

Another question that comes to mind is outside temperature while PC'ing. Do the bullets care if their cold while being sprayed :p LOL or should I heat the garage a bit before ?
 

Beagle333

New member
I still wanna see the trick with the wire. I got a buttload of .270 Loverin cast up, and am casting several profiles of 30-30 today and they all need coated... somehow. ;)
 
Well then, I better get my rear end moving! :) The stores will be opening soon so I can get some supplies to get started. I'm pretty optimistic this is going to work even if I have to modify something in the process. We shall see...
 
Well, scratch that entire idea. I just made the project and as I insert the bullets between the wire it just spreads the wire and looses tension. Even if I pinch in between the bullets it makes the tension even worse.

Back to the drawing board but I'm thinking your idea has the best merit Beagle333 by using the washers.
 
Last edited:

Beagle333

New member
Bummer. I had big hopes for that. I know the 30 cal bullets will work with the washer idea. But I do have a plan to drill some holes in a kiln dried hardwood board, cover it in non-stick foil, and poke the GC down through the foil, and that should leave the bullets standing upright and firmly. Then after baking, I will run them through the sizer to remove any bit of flashing that might have formed (probably won't be much at all) and then put the GC on the bare shank like usual. At least... that's one plan. I know from my nail rig that I use with HP's, that a board will survive a 400° baking for 20 mins if it is wrapped in Al foil. I would use an aluminum block, but we don't have a local scrapyard that will sell to the public.

Today is casting day though. :)
 
I ended up drilling holes in a board and covering it with non stick aluminum foil. I stood the bullets up in several neat rows and sprayed them. I have a black powder coat from DMC2 that worked out very well and not much resistance removing them from the foil. Sizing was a breeze too.

On the other hand I picked up some Harbor Freight red and it was a real pain. Almost too brittle at the base and when I sized them the PC stripped on the last groove near the gas check.

I'll stick with the DMC2 powder coat from now on as it worked much better. It said to be TGIC polyester base PC and i'm thinking the HF red is not. Quite a huge difference the way it handled.

EDIT: I just tested and they both passed the hammer and acetone wipe test so I'm good on that.

Black_310Custom_zpsc1b71bfd.jpg


Red_310Custom_zpsd0e11c80.jpg
 
Last edited:
I got some more time last night to cast and powder coat some more 30-06. This one is my new color but haven't had a chance yet to try the Signal Blue but I think these Zombies turned out nice.

Zombie 30-06

DSC_0723Custom_zps1de526ed.jpg


DSC_0727Custom_zpsc5f32e08.jpg
 
Top