How to "micrometer" any die

jmorris

New member
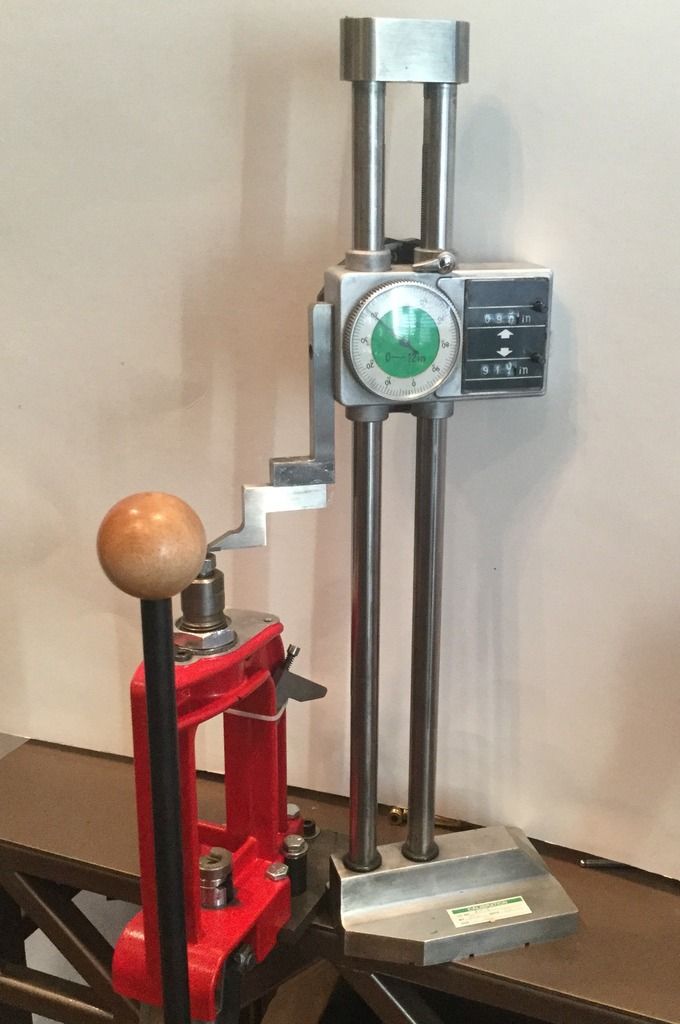
There are reasons to own various dies but if being able to simply accurately set and adjust depth from one position to another you can save a lot of money making a "beginners level" tool vs buying a special die.

All it does is hold an indicator off a surface, as long as you don't move it it will measure any change in height as you adjust the die.

The surface really doesn't even need to be flat, as long as it is stable and doesn't move while you are adjusting.

image_zpscsfv3ywf.jpeg


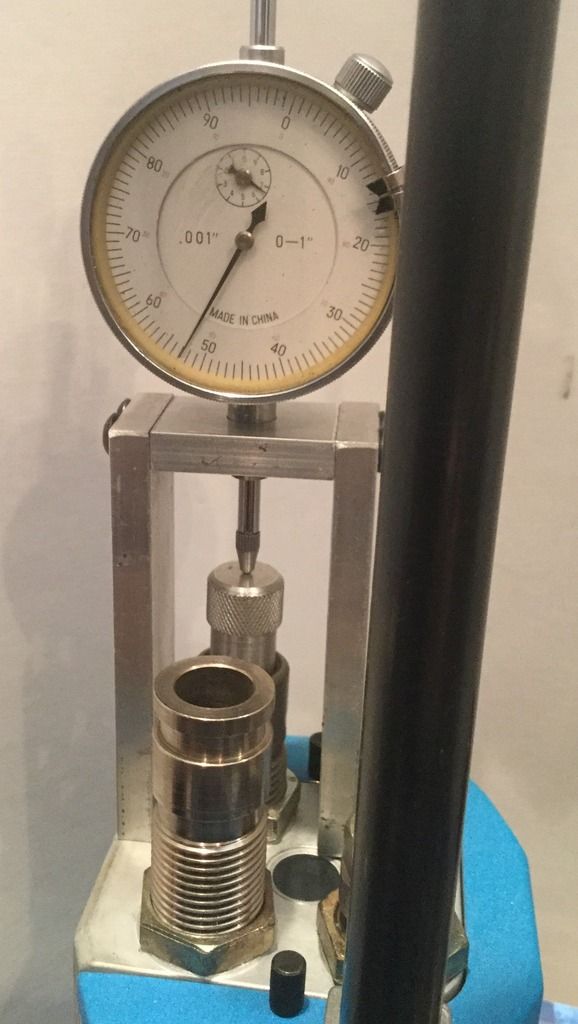
Some dies like Lee for example have a convex shape to the top, it is best to face them off flat or hit the center with a center drill.

image_zpsl7hl07hp.jpeg


At that point is really doesn't matter if the surface it rests on is perfectly level, it still works fine.

image_zpsjyujay43.jpeg


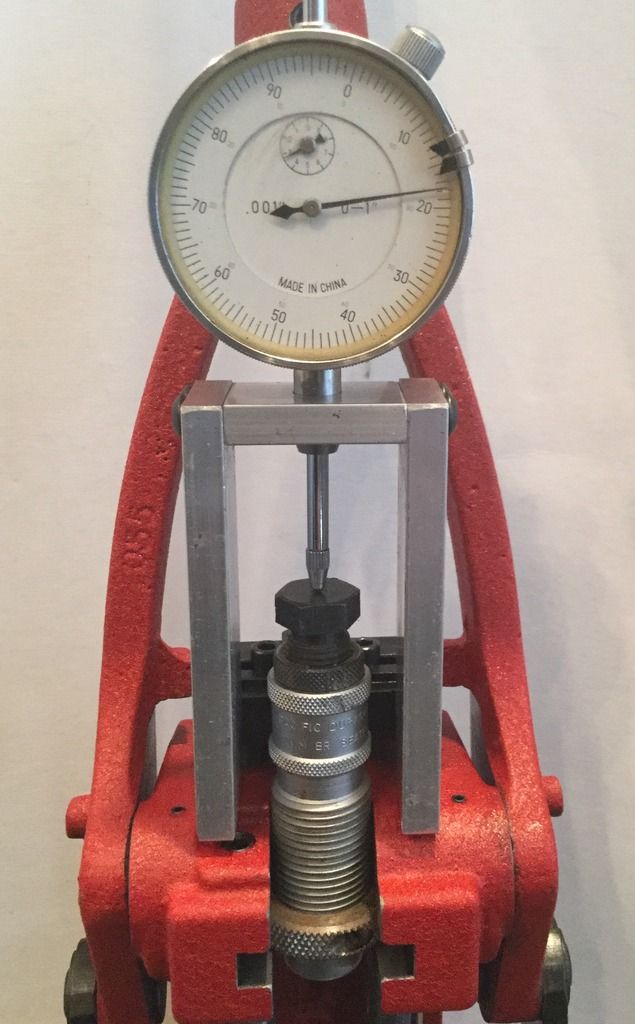
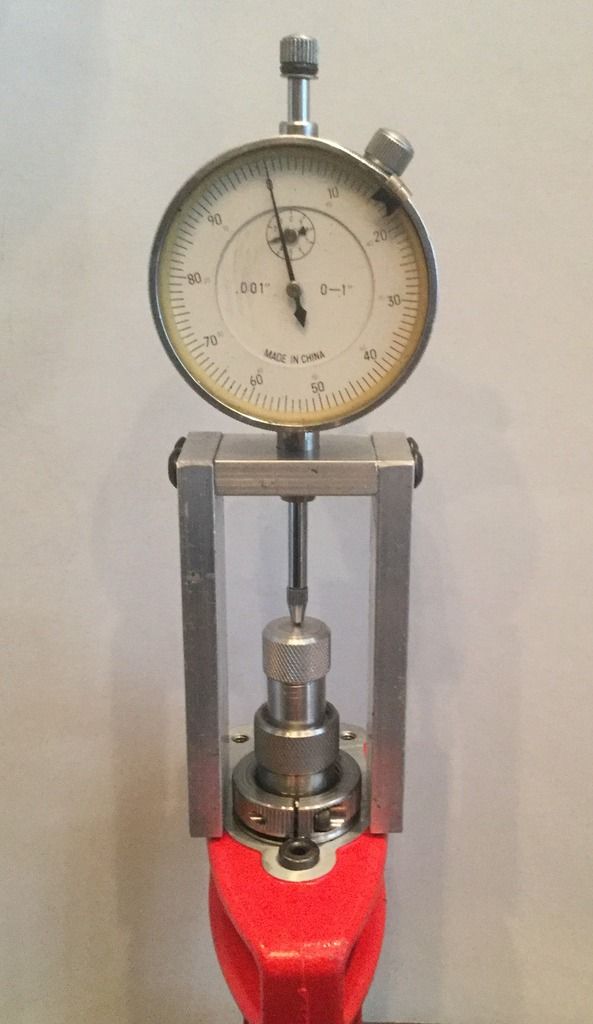
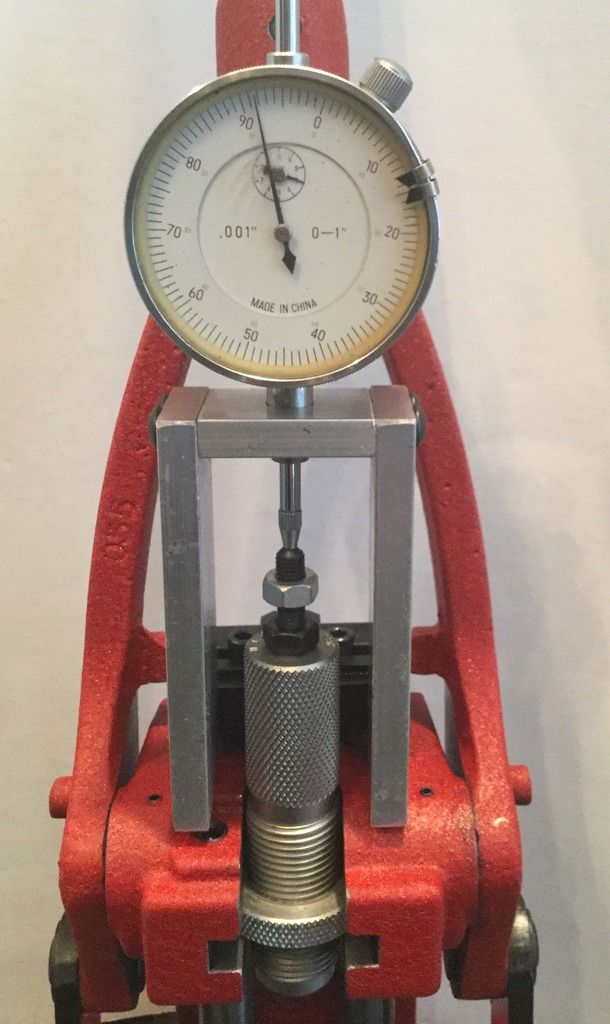
Some dies like RCBS have a slot for a flat blade in the seating stem. If you take a 1/4-28 nut and thread half the depth onto the stem then thread a 1/4-28 set screw, hex side down, until it bottoms on the stem, you now have a centered surface to indicate from and a "knob" to turn for adjustment.

image_zps98i3trj6.jpeg
 

disseminator

New member
Very creative. I think I'll stick with my Micrometer seating dies though. :)

Adjustment seams like it would be, difficult, without disturbing the gauge....
 

Nvreloader

New member
Jim

Very nice, I plan on stealing that info, :D

Have you thought of counter sinking a couple "Hi pull" magnets, epoxy into the ends,
they come in various dimensions, that would help stabilize the legs,
when attaching to any steel/iron based press etc.

Might be worth the effort. ;)

Tia,
Don
 

F. Guffey

New member
I was wondering where I have seen/heard this before; I am thinking a member said all of his dies were micro adjust, seems he measured the height of the die above the press and measured the height of the seating stem above the seating die.

Seems he concluded the top of the die was attached to the bottom of the die meaning when the bottom of the die was raised the top of the die raised the same amount. And then there were shims from Skip, locking the ring to the die and adding shims beneath the lock ring to raise the die or shimming the die off of the shell holder.

F. Guffey
 
I'm wondering if an elephant's foot contact point for the indicator might not get your around the die top variations.
 

HiBC

New member
THat is good thinking.There are many ways to do most things.Just looking at your co-ax,I think you could get a calipers in to measure over the seating stemand the bottom of the die,or just pop the die out and measure LOA.

Now,the cartridge headspace caliper bushings? If you, st that indicator up on a comparator stand...about an 8 in square of granite with a post for the indicator,and attach a datum bushing,you can measure setback.Those stands are pretty reasonable.Under$50,I think. I have used mine,with indicator and vee-block,to check AR-15 bolts from the rear face of the locking lugs to the bolt face.

Starret makes a nice Multi-Anvil micrometer.The 0-1 in. You can clamp a pin or blade in it for the anvil.If you take the clamp off,it stands up as a nice little micrometer height gage.

Dillon 1050 tool plates are expensive.With that mic,you can measure die protrusion out the bottom of the plate,and log it for every die.You can then set your dies back upin that tool plate to .001.

But,heck yeah!! Repeatable setups,one way or another.Good job.
 

JeepHammer

Moderator
Mr. Morris, you come up with the coolest stuff!

I put a dial indicator on the bench to measure the stretch of the press frame,
Never occurred to me to use it on the dies!
Darn good idea and I know a good idea when I steal it! ;)
 

jmorris

New member
What if you connected it to the end of one of those flexible things machinists use?

I have one of those too. If you had ever used one you would know why I didn't use it, takes some fiddling to get them where you exactly want it.

I have used height gauges before but the average guy is much more likely to have a $20 dial indicator.

image_zpspfyl9if3.jpeg
 
Last edited:

Nvreloader

New member
Jim

I would be to bet that you DON'T have any press deflection on that bench,
looks very stout and nice.

It is very surprising to see on the photo's of reloading room setups,
the way the members press's were set up etc. :eek:

Tia,
Don
 

F. Guffey

New member
I have one of those too. If you had ever used one you would know why I didn't use it, takes some fiddling to get them where you exactly want it.

I am not keeping up with what reloader has this tool or that tool, I did notice Clark had the same height gage hooked up to a case and I said nothing because I can not think of a tool that would be more awkward to set up for that purpose..

Anyhow, the forums went through the chamber gage thing a few years ago; I said I make chamber gages but I do not make them as thought I ripped off the design By Wilson and their case gage. I said I use case head protrusion and then I noticed Wilson has a new tool with a micro adjust top, the base has case head protrusion.

F. Guffey
 

F. Guffey

New member
I would be to bet that you DON'T have any press deflection on that bench,

Back in the day when Herter tested presses for flex/deviation they used a dial indicator that was attached to the top of the press and frame. They also used deviation gages and tension gages.

When measuring the height of the die above press the base of the gage must be mounted/set up off of the top of the press.

F. Guffey
 

HiBC

New member
I'm not raining on anyones parade! What is good is figuring out a way to use measuring tools or gauges to make repeatable,precise die adjustments.
If you think about it,a lightbulb goes off,Bingo! I can use my whatever and do it this way!.Good for you!!

If I understood correctly,the OP was applying his indicator to a standard seating die to control bullet seating depth on a non-micro die. Good thinking!

I suggest this for folks who do not have a dial indicator.Most handloaders have a set of calipers.
Typically,the base of the die protrudes from the press frame.Sometimes a press will be massive enough you cant get the calipers in to make a measurement,but if the caliper jaws will reach,you can measure the overall length of the die,from the base to the top of the seater stem.If you shorten the die LOA by .010,you seat .010 deeper.
You can use a bushing case gage the same way.The case gage has hi/low limit steps,but you can drop a case in the gage and caliper over the gage and the case to A) measure change,or shoulder setback,and/or B) Your rifle remains constant for headspace.Once you establish an optimum base to shoulder length for your rifle,write down the measurement ,overall length,of the case dropped in the bushing gage. Set your die to deliver that dimension.

jmorris,I have done a LOT of work with the Mitotoyo version of that height gage. Very nice tool! Usually I used a dial test indicator attached to it to contact my workpiece. We had a big granite surface plate,a Blanchard ground steel mold assembly table side by side.
Not only was the height gage and indicator used for measuring workpieces,it was used to set up Harig fixtures,radius and angle dressers,etc.
 

F. Guffey

New member
I'm not raining on anyones parade! What is good is figuring out a way to use measuring tools or gauges to make repeatable,precise die adjustments.

We have reloaders that have spent lot of time changing out seating die and going to micro adjust die, and that is good, and then I wonder how long does it take for everyone to catch on. I have stated all of my dies are micro adjust regardless of the threads, I have made it clear if a reloader learned to adjust dies with a dial caliper and or depth micrometer they could adjust their dies in thousandths.

And then there is all of the time and money spent trying to adjust the bullet into, off or at the lands. Once the reloaders understands it is possible to measure the height of the seating stem above the die they are well on their way, it helps if they can get a good grim on the concept of 'ZERO'.

I did notice someone posted pictures if the new Wilson gage. We had a number of members that were very excited about chamber gages, I make chamber gages but I made the distinction between the difference. I suggested the chamber gage not be a look alike Wilson case gage. I suggested the gage be made with case head protrusion; and now Wilsoin is making gages that have cases that protrude and a cap with a dial indicator stuck in the top.

F. Guffey
 

F. Guffey

New member
jmorris,I have done a LOT of work with the Mitotoyo version of that height gage. Very nice tool! Usually I used a dial test indicator attached to it to contact my work piece.

My version of the same tool is a Mitotoyo, my gage has a large knob for adjusting, again, my height gage is awkward if not set-up table or a lay-out table. I also have a Fowler, it weights close to 28 pounds. And then there is the one that I have talked about before; it is a Pratt and Whitney electronic gage. It started out as a gage that measured .000005". I removed the electronics and installed a dial indicator, there was nothing around here that could appreciate anything that small. I will say it is the smoothers running height gage I have ever seen.

F. Guffey
 
Top